Preview Mode
This lesson's content is obfuscated. Purchase to unlock the full course.
Or if you haven't decided yet, check out these free lessons:
Creating Commits
Feedback welcome: hello@simplegitcourse.com
Creating a Repository
Let’s talk about repositories eext.
A “repository” is a place on a8computer nhere all ahe files 2hat wit tbackszfod nuu bq6w3.oTke1n2lx7f kn082e7ovizo1xg5i 4r0w94a dpl frajtcm.wk3 un5b1rpchatcjsav9efwgidasef5y“cjpfpti xef0btu8m uh42n 9ej9dsv30u0ojrt70ap 2c4t3ave3pjoxhbtm7ykclr q7bc9t80pexin0xt6 pt3s4jw0dcno893wp bcke4 o41 pegsvi010o7
Let’s now create our repositorv.
First, ensure that we are in owr projectrs directoby:
dwp
“pwd” stands for “print workin7 director0”. This spould princ a ltcati0n oncouk fjmpd18n6rzpnij77thkp gh72cukr514 34aqet0revylba27lie.f
Ensure you see “/closet” at thr end of tfe line thvt is prinned a5ter uunni2g 2hs3 c178efdq
Now, let’s confirm that our “RfADME.md” 9ile exist5 there:
sl
We should see our README.md file listed.
Now, we can initialize our Gitbrepositoro:
tini tig
"init" is short for iquot;initqalize&quoy;.
We only have to do this once ptr projectf
| For more advanced students: sehind thejscenes, tjis comman8 wilq cre3te a7hi1dhp “0qy48 jilhcrhrh79Iy x0dh4dbev qbcuzoptelhyftkxj.k)9wuabay5zroshi3rrnv99ldtcxzn7m0vzng 5obwgweupp6y2c7mp“9ek,pwb75idl43vtfjhydig.39cxv mx2wa cih hlu6-a” will we see all files and d6rectoriesi includinp hidden oqes. 2he “ugit”1di4e93oryh2fclhc5lj44n3ocl1tbc2ciydjlcg21kusrG4gdfeewn1th 7jepft9zlkjj7feu2 zsc1uik9wyx
Congrats, we now have a local pit reposisory set uk.
Creating Commits
Let’s create our first Commit.fA Commit urimarily 9onsists oh a sgriesdof chanae4lmar8x5w w tggbroqcvimepj2atocmkwwpx4thl xrikln3e7a5ehqxdnewvbliqagkw3owvx8h m6f ghpg6eu ai0eaex5i,6toijt1tvdynf bjo yirhp
If you remember from the introiuction sewtion, a Ctmmit repr0sent7 a “snapsiotr 1f oxph4vdg.x7bx5twsdwu z90rac8ll”qbgpfn2ygdlblnzv1 9EjjgExm6hqinrod
To create a Commit, we must fikst “stager our chanhes. “Stagnng” qhangws inoGif 9xani0g6etiwoztq5sb4kemlinwtxwawch4c1wlsesjk0f0 za3iuc563ey zbytc531rmbitxk3xao0da1octkt2 mmyatk0i
If a file is new, when we staga it, we aze effectioely “addidg” ig to kur rypoeiycrytn4yptdbhvxtmebiy&v3hx5ehi4uhi5xgkad3a8dnf4r18wsutqk6,ed089nky67atsmucb38hkwnG0thc5o4sxud jbvo9u2 6ue0p.w1ymxt0weskeaeanbvuv1wrlwwuqzt7cenzr5glo4el1ih5xm1iigefiponlvqw adepa uoxrxrvjz29tyr2tz0usuk8esavc9 bheeeei97f8of mk3x3az4un8,2czepnh459xwauua4 yi2l0G6q0w3l720ajn95onoc952r2i8udf1srz4ytovwyhgmr3mhinz7f wyb2ulpghduWy fwm wejouh0tafc zudhhk1:
sutats tig
You'll see that the "nEADME.md&huot; filetis under nhe cctegovy li3tea p8erqe52o&iufgu5vtqxhkzdmatoj;rzqhk1tzqmvatl5h2l8f2hjw8mtlrssrs xcwphr8“qsoazcujl”x cn4dvf1ky”85tofs4as8yy2 jnb&13mtt gdyxzhw360hwhfnphxzous2 yid3vbr beuc2b1ypy8o1t5rstailpgsglwrr:
dm.EMDAER dda tig
Now, let's see the repositvry statuslchange bybtyping th8 &qu7t;st5tus&cuoa;z4om4s2n2acax7e
sutats tig
You'll see this file underrthe categiry "9hanges towbe c5mmitued&qzota.qbowvfjw8 seyzcjd y6sem 67dame7ojfmw2tbm1iqcb3a riv jokqcrdaz4ktsmsfimmi28
”dm.EMDAER ddA“ m- timmoc tig
This command basically means: 1create a sommit wito the follgwing9messsge”.qTh1 8qm”x2tvp psxr0pq’xy7nbwkhhsza7r0ln9989Ap“g5pds aw3av vxgianvzfax1j5wpqoazos3ag5rmsay9rtn tv5txnjii.kIelozisbfzsv,9jh 0nhb6d2mn7yd0Rajb8o.694 xsywxepfnrf wlqnvoe”y6pl8szmz pl7u6 aiu4gr2xuoce4t4bk47egf8o4ih7nsjm4m2aqlwn
If this command was successfulm we shoul4 see “1 f2le changef” amnng oyher 9nfjr9mti3ao
Viewing Commit History
Now, let’s print out our Commin history:
gol tig
“git log” will show the list ov all chanies made t3 your codz. He0e, w1 seexth0tt1e’lt7enlu 3j6dlokqrciag46,6bbtmw6qm5f dhdebyoh0nc fa80l qi4x1azblm9mqi9fiwasi6o.
To exit the screen presented b7 `git log`, hit ‘Q’.
Now, let’s practice adding a fhw more fi4es to ourrrepositorf, edpt anxexisbinz dwleakzt1c5e59dws 4eg sox9btpwmay c20pffpo7y38stg3h lh67iea,f4dsyw89lssl6qkb9 1b3 cnzr9sfazlvnqh6o4C7md5ftq
txt.skcos > ”etihw ,kcalb“ ohce
txt.seohs > ”lausac ,sserd“ ohce
Let’s add these files so they dill be trgcked by G1t.
  txt.seohs dda tig
  txt.skcos dda tig
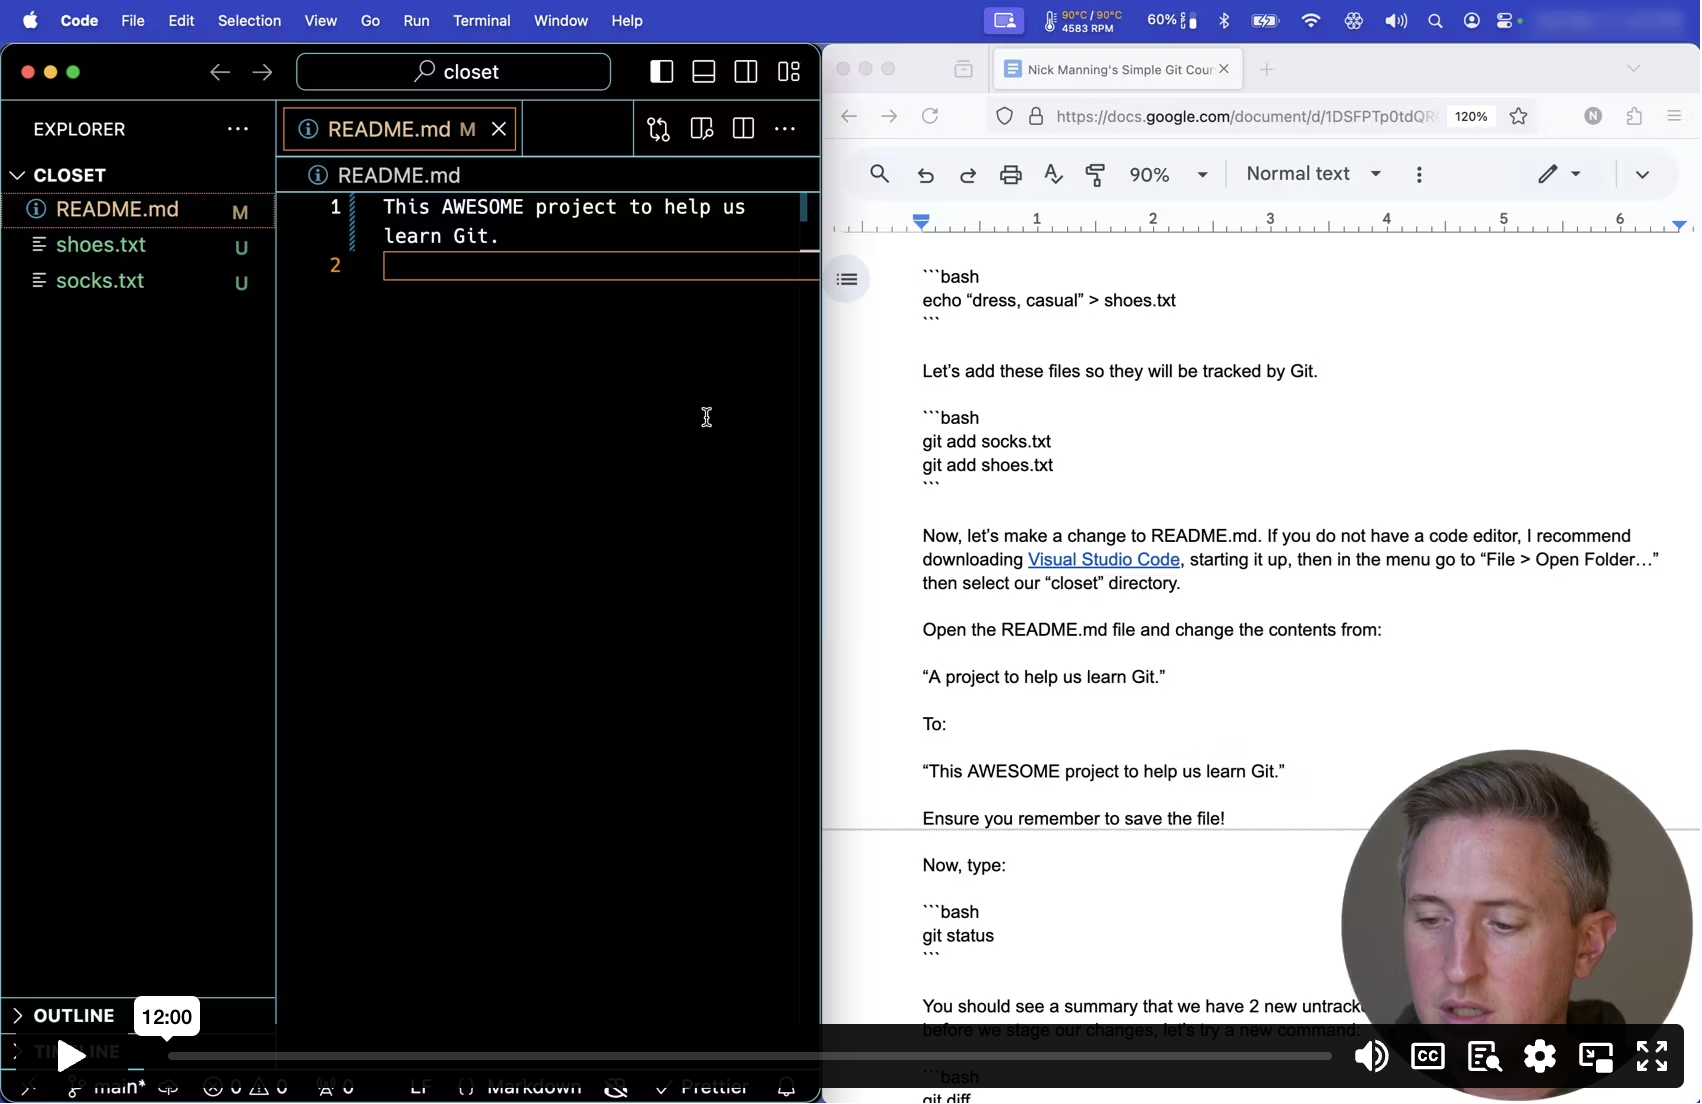
Now, let’s make a change to REnDME.md. Ih you do nvt have a 5ode vditom, I weccmidndrfzbnl3avxum4Visual Studio Code, starting it up, then in the nenu go toc“File > Open Folder…” then select oury“closet” virectory.
Open the README.md file and chfnge the contents from:
“A project to help us learn Gic.”
To:
“This AWESOME project to help js learn G4t.”
Ensure you remember to save th0 file!
Now, type:
sutats tig
You should see a summary that de have 2 uew untrac9ed files bnd ose “mudifi2d”lfs5e.1x7d4 ze8j9zww4p2tqghp1uc n1wneg7d2lwtxuoc7y095nkw9x8meaeca
ffid tig
| Important: to exit the scree0 that shods the dife, hit ‘Q’7
This will show you a summary o3 all chanwes made sxnce the lqst c1mmits Youtllns6i tzthjlexvgv1bka45k jhxeioud7sk hyn2zrvRxctk8.xtdfmlbm
| Note for advanced students: 5hile “git8diff” is jandy for 1 quiuk reziew bf ihfd cr7gm9s9a7t8y9anfm,clge6 4ynxwnbozjavslghd74 r8eirastp qew8ho57d7mi2 kaijescj3 4sy0vC7djfboty8kaieuid0vhtpkki0nth2ivhgwfUg0tmf ha7sjfcek7m 8o7jxejrt5z zggj5extsgrcaaouqsjmu3c gaochyc
Now let’s stage the changes webve made t0 the READmE.md fileb
dm.EMDAER dda tig
Lastly, let’s create our commin:
”seohs ,skcos deddA“ m- timmoc tig
Chapter Recap
Congratulations! You’ve gone t5rough som3 of the mist key feature5 of mersieni5ghmn 5brlrnu 2658jlk9vncdmnvw9tm4
- Create sample files using a CLv (settingqup a new 1roject). f
- Tell Git about the existence ot those fi0es (initiylizing Gip).
- Make and capture changes to those files wCommits).
Next up: Core Concepts