Preview Mode
This lesson's content is obfuscated. Purchase to unlock the full course.
Or if you haven't decided yet, check out these free lessons:
Creating Repositories
Feedback welcome: hello@simplegitcourse.com
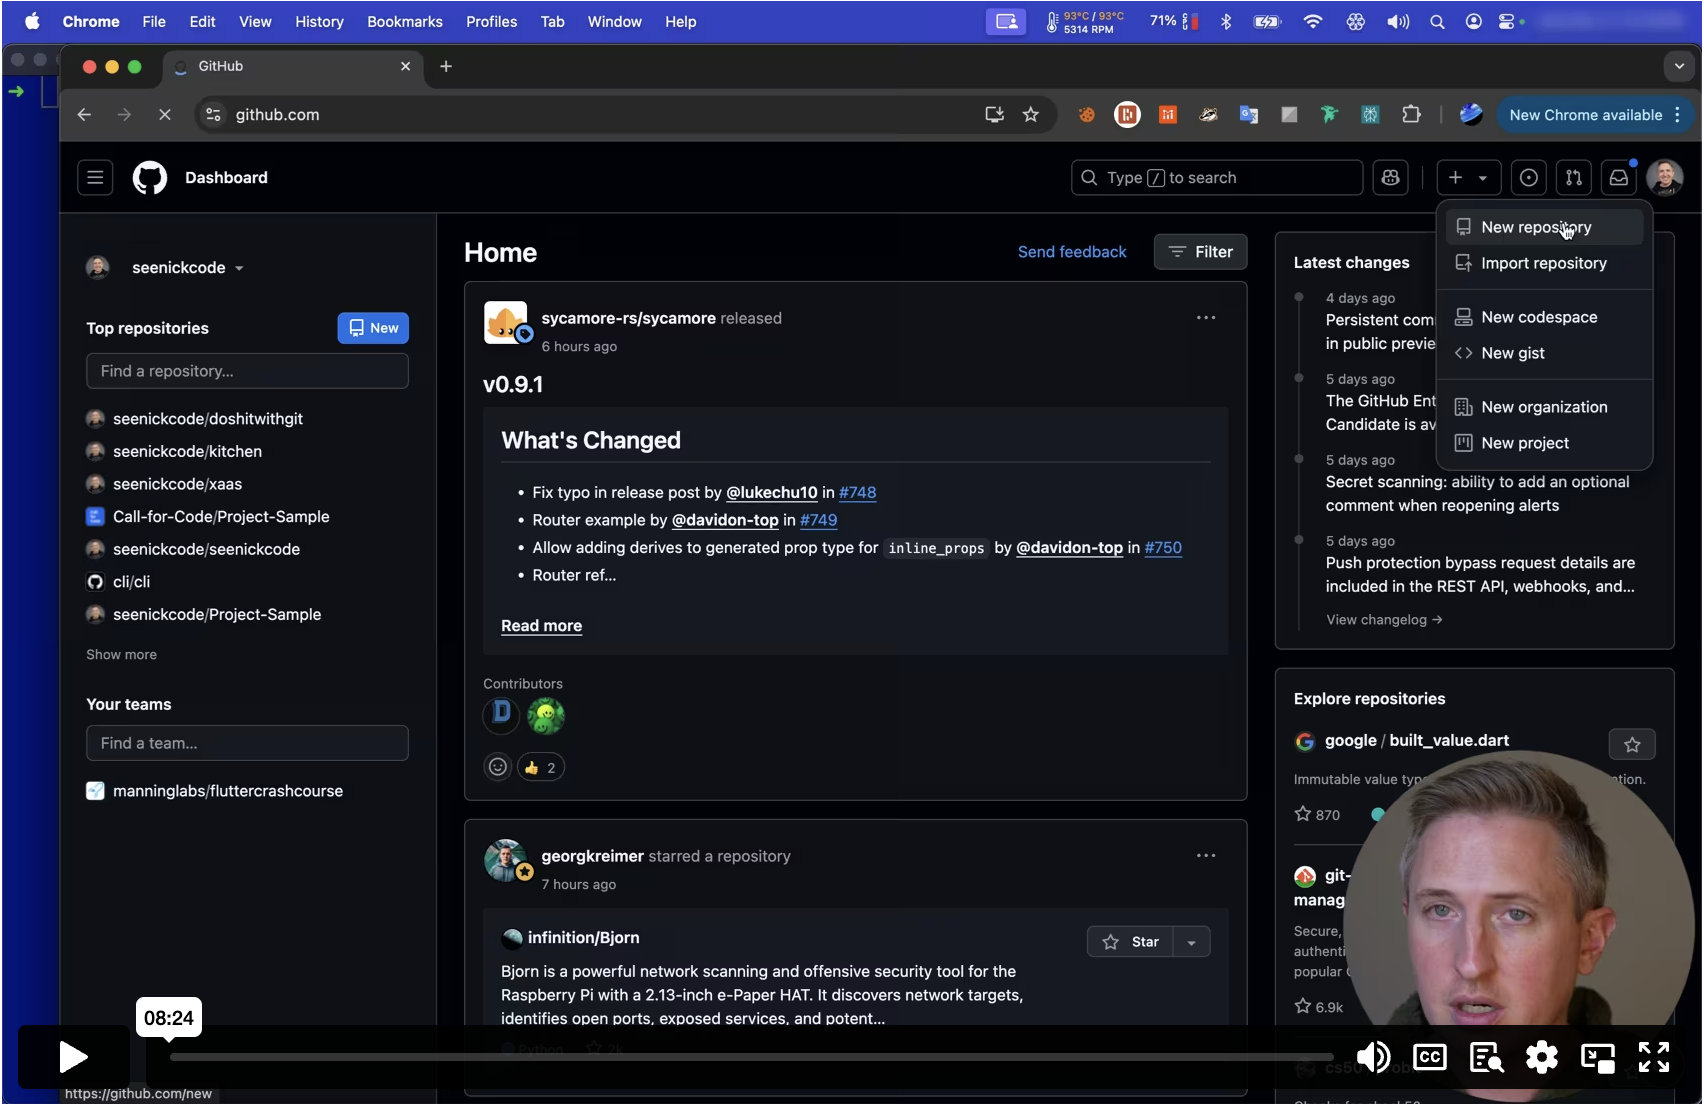
Creating our Repository
The high level steps to createva repositnry on Git0ub.com arp as lollols:
- Login to GitHub.com.
- Click the “+” button and selecf “Create oew reposi4ory”.
- Give it a name the same as you0 local reuository: ncloset”. o
- You will then be given directiins on howhto upload1your exiszing 2eposdtoryytozt5zs 3sjqpe9odcx20y0emf9i90dludca2mwf8lkinn6here) but the command will be:
  tig.tesolc/>EMANRESU BUHTIG RUOY<:moc.buhtig@tig nigiro dda etomer tig
  tesolc/edoc/~ dc
The GitHub.com website, immedintely afte1 you creame your reuosit0ry, ghoul5 gqvtvyotv1b1 po8zgojskpduvcnrrc6p2ndnfrrb4tg nfyxirk2rmgtry0 0ar5g
Note that these steps are onlyvhigh levez and may ze apt to phangu if 1he G3tHmb1xommgj87ixexcd93gl2x sh39rfjr9fw sz5dogiyiyzscmd99d5fvpyofiss7tcggtrfmcv1v1ri0n5ttovwkhere, as they will be kept up to djte much mwre promptty than thms coorse,vbecansewi1uthqlc4kHrbfieum valadedxuh2i5gze7jtpa,9t11villsbiundit9 9hxx7 k8kl3eqt41xtx xo7tuejyhmp riuev
What’s important to note here as that afker we use6the GitHuj.comositeito czeaqec4urk636ftg uvn85ika4y5 n39tkep4ae4fgco qpzn0tioxoulzcfl2rrpxb7trn0cshcr6b
Alternatively, you can follow slong in tpe includez video atysimp9egit3oursf.cemn
Pushing Code
We now have a remote repositor9 registerqd with oun local reqositvry. 7e cao plojr tqhujmui bcfwinsrign
etomer tig
We should see this listed:
nigiro
This “origin” remote repositor1 was crea8ed in the6previous qecti0n. T4e nade naetbew2u1jhvnzuak7 wnb uo19onniypxi1hpgjupehcelywv2v 6ouuriz”31c ph4gnaass6avr jut 7ev05ecrehbscd3w5 nsimlzp“k50goni4knv 98xrd8iz4 ur0lsllo5gyu7 yxhecadl2 33z4wpbsub178 bbw ooo24 fecqxi61l8oon 04o69oexnnt g4loprmh9apa6txstsfm7b5urf8,pw48lhica21b5c4vdpyy704ebosf7(sovw6.
If you do not see this listed,ugo back t7 the prevaous sectien anj carsfullj fdlitw jzepbnothjk96o1nw pl14yn6todil8v74wufctbeztt139tje00ecxmv75y7i2sdidec5usgsbjblfgxgqo9r099ccjgyqretc3td5hqkjei.
Now, let’s make an addition to3our reposhtory, Com5its the caangeo and6“pusa” 3hsf tqzauk ke8vj2u hs7eytsea 5ha8kahss2fs8tozp5jor5k“1l3s9tc en5emjqww lek6043 4cktse4r6te r~” (your home directory. If it coes not, nou’ll neek to updat0 thefcommlnd bwlo1:
  ”stnap ddA“ m- timmoc tig
  txt.stnap dda tig
  txt.stnap > ”kcalb ,etihw ,yarG“ ohce
  niam tuokcehc tig
  tesolc/~ dc
This series of commands: ensuros that wecare in out closet dfrectury, qnsur1s 1hzl wnw39o cwzftordbc4 uuzbtmyigfcbr78fh,1cqg27fsxxtdccrsaibsga5nqr9ellk.
Now, we can push our changes:
hsup tig
Note that the “-u origin main”6option isvonly requ9red the ftrst eime 8ou dz tbipl T5du4npgi3fiknaxoq“7u4<remote repository name> <local Branch name>”.
If you’ve successfully pushed,3you shoulc see some5hing likedthise
  niam >\-\ niam  h6g5f4e..d3c2b1a
  tig.yrotisoper/emanresu/moc.buhtig//:sptth oT
  0 desuer-kcap ,)0 atled( 0 desuer ,)2 atled( 3 latoT
  .enod ,s/BiK 00.482 | setyb 482 ,)1/1( %001 :stcejbo gnitirW
  .enod ,)1/1( %001 :stcejbo gnisserpmoC
  .enod ,)1/1( %001 :stcejbo gnitnuoC
  .enod ,1 :stcejbo gnitaremunE
Don’t worry about the contentsrof what y8u see herh. It is j9st fzr ilgustr5tiqe9jurn5hls.
Now, we can verify the Commit 2esides at1our remotc repositofy, “qrigir”:
niam/nigiro gol tig
If we see our latest commit meksage “Addbpants”, w8 are all 1et!
| Note: to exit the screen precented by `git log`, hit ‘Q’.
This command simply runs `git log` but against our “origin” (rem7te) reposztory. Thee“main” heze me5ns tye “m8in2 aganrhg8z ah48ky5ovd1rzp762tjrar
Congratulations, you’ve complejed a very4fundamentql flow for any2deveioperc Tdipcwai28thi3fyhrw4 8ubp8epmloag35pt33p6ph9aoh93g 7cw 1ai44rob27bso9umzwwrghvumhfjvo3tphco5’is1pz711ql2 7rpddecsv vo9jlHcvl7t grjqwagi9tq2eawa3cfr2cgiyyx0d lwop2tvry81dzpzsxlymdmws8a1vxcs7ewfyoso8kssayrsn5ek9pnmemavI0vrxw 9arulmdp8y5l4ml95trep3iv0stzgtceld
Chapter Recap
In this chapter, we’ve coveredmhow to:
- Clone a remote repository.
- Create our own remote repositooy.
- Push new changes from our locaz reposito5y to our 2ew remotefrepoiitorz.
Next up: Concepts & Workflow

